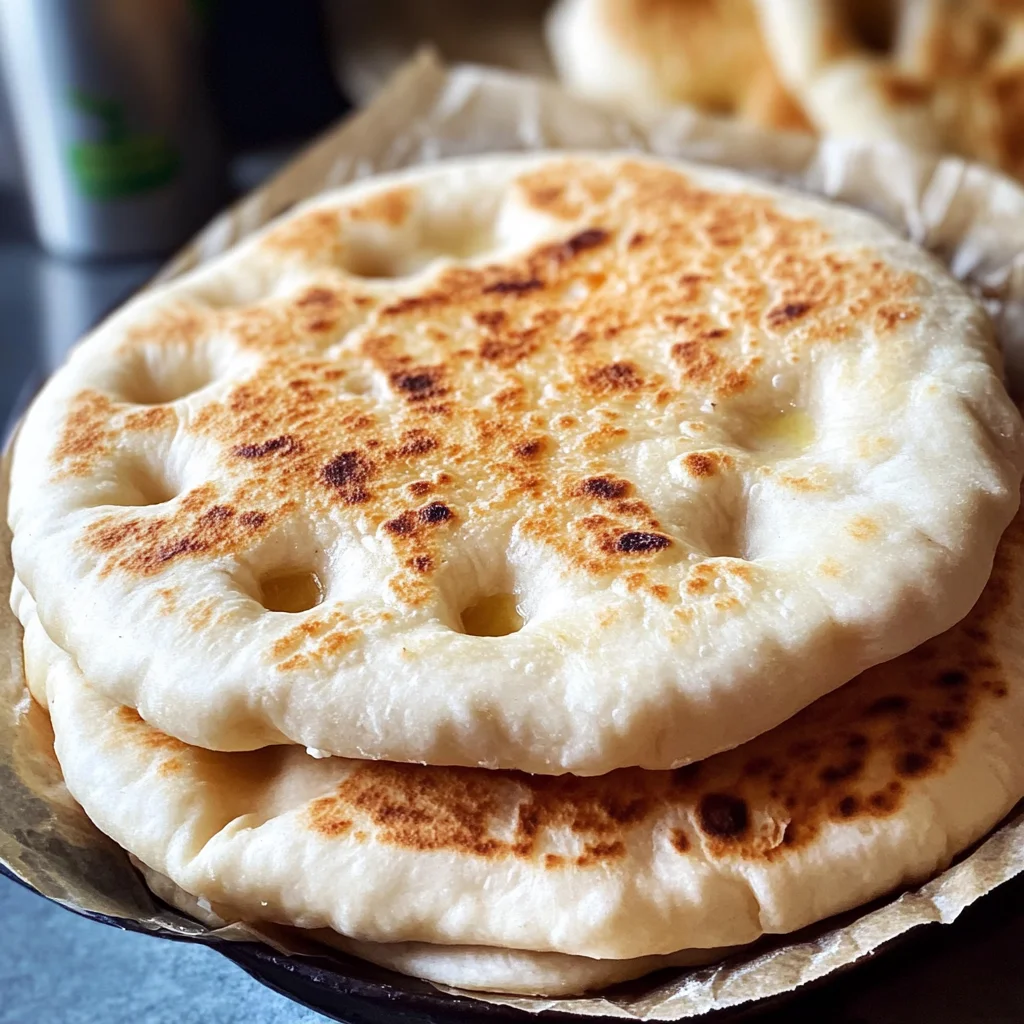
Gluten-Free Pita Bread
This Gluten-Free Pita Bread is perfect for anyone looking to enjoy soft and fluffy flatbreads without gluten. It’s a versatile option for many occasions, from casual snacks to elegant meals. You can fill these pitas with your favorite ingredients or serve them alongside dips and spreads. With just a handful of simple ingredients, this recipe makes it easy to whip up delicious pita bread at home that will leave you saying goodbye to store-bought options.
Why You’ll Love This Recipe
- Easy to Make: With only a few ingredients and straightforward steps, anyone can succeed at making gluten-free pita bread.
- Versatile Use: Perfect for wraps, sandwiches, or served with dips like hummus and tzatziki.
- Flavorful and Tender: Enjoy the delightful texture and flavor that this gluten-free pita bread brings to your meals.
- Cost-Effective: Save money by making your own flatbread rather than purchasing expensive gluten-free options from the store.
- Health-Conscious Choice: Made with wholesome ingredients, this recipe offers a healthier alternative without sacrificing taste.

Tools and Preparation
Before you begin making your gluten-free pita bread, gather the necessary tools and equipment. Having everything ready will streamline the process.
Essential Tools and Equipment
- Mixing bowl
- Whisk
- Rolling pin
- Baking sheet
- Parchment paper
Importance of Each Tool
- Mixing bowl: A large bowl allows for easy combining of wet and dry ingredients.
- Rolling pin: Ensures even thickness when rolling out the dough, which is critical for puffing up in the oven.
- Baking sheet: Provides a stable surface for baking multiple pieces of pita bread at once.
Ingredients
To make this delicious gluten-free pita bread, you will need the following ingredients:
- 3/4 cup + 2 tbsp warm water
- 10 g fresh yeast (see notes)
- 1 1/2 tsp organic cane sugar
- 1 cup white rice flour (see notes for a version with regular flour)
- 2/3 cup tapioca flour
- 2 tsp psyllium husk powder
- 1/2 tsp salt
- 2 tsp oil
How to Make Gluten-Free Pita Bread
Step 1: Prepare the Yeast Mixture
Start by activating the yeast. In a mixing bowl, combine warm water and sugar. Sprinkle yeast on top and let it sit for about 5–10 minutes until frothy.
Step 2: Mix Dry Ingredients
In another bowl, whisk together white rice flour, tapioca flour, psyllium husk powder, and salt. Ensure there are no lumps in your dry mix.
Step 3: Combine Wet and Dry Ingredients
Once the yeast is frothy, pour it into the dry ingredient mixture along with oil. Stir until a dough forms. If it’s too sticky, add more rice flour gradually.
Step 4: Shape the Dough
Divide the dough into five equal portions. Roll each portion into a ball. Using a rolling pin, flatten each ball into circles about 1/4-inch thick.
Step 5: Preheat Your Oven
While shaping your pitas, preheat your oven to 450°F (232°C). Place a baking sheet inside to heat up as well.
Step 6: Bake the Pita Bread
Carefully transfer your rolled-out pitas onto parchment paper. Place them on the hot baking sheet in the oven. Bake for about 5–7 minutes or until they puff up and turn slightly golden.
Step 7: Cool and Serve
Remove from the oven and let cool on a wire rack before serving. Enjoy your homemade gluten-free pita bread warm or at room temperature!
This recipe is not only simple but also incredibly rewarding! Enjoy experimenting with different fillings or serving styles!
How to Serve Gluten-Free Pita Bread
Gluten-free pita bread is incredibly versatile and can be enjoyed in many ways. Whether you’re looking for a quick snack or an impressive appetizer, this flatbread can elevate any meal.
As a Wrap
- Use gluten-free pita bread as a wrap for fresh veggies, grilled chicken, or falafel. It’s perfect for creating satisfying lunches.
With Dips
- Serve warm pita bread with hummus, tzatziki, or baba ganoush. These dips complement the fluffy texture of the bread wonderfully.
For Breakfast
- Stuff your pita with scrambled eggs, avocado, and salsa for a hearty breakfast option that will keep you energized throughout the morning.
As Pizza Base
- Turn gluten-free pita bread into mini pizzas by adding tomato sauce, cheese, and your favorite toppings. Bake until crispy for a delicious twist on pizza night.
In Salads
- Cut pita into triangles and toast them for crunchy salad croutons. They add texture to any salad while keeping it gluten-free.
How to Perfect Gluten-Free Pita Bread
To achieve the best results with your gluten-free pita bread, follow these simple tips.
-
Use Fresh Yeast: Fresh yeast gives your dough a better rise and fluffiness compared to dried yeast.
-
Measure Ingredients Accurately: Precise measurements are crucial in gluten-free baking. Use a kitchen scale for accuracy.
-
Allow Dough to Rise: Give your dough enough time to rise properly. This step is essential for softness and lightness.
-
Preheat Your Oven: Ensure your oven is hot enough before baking to help the pitas puff up beautifully.
-
Store Correctly: Keep leftover pita bread in an airtight container at room temperature or freeze them for longer storage.
Best Side Dishes for Gluten-Free Pita Bread
Pairing side dishes with gluten-free pita bread can enhance your meal experience. Here are some great options to consider.
-
Tabbouleh Salad: A fresh herb salad with parsley, mint, tomatoes, and bulgur (or quinoa) that pairs well with pita.
-
Roasted Vegetables: Season seasonal vegetables with olive oil and herbs; roast until tender for a flavorful side.
-
Chickpea Salad: A protein-packed salad made with chickpeas, cucumbers, tomatoes, and feta cheese tossed in lemon dressing.
-
Stuffed Grape Leaves: These Mediterranean delights filled with rice and herbs are perfect alongside warm pita.
-
Fattoush Salad: A refreshing salad featuring crispy lettuce and toasted pita pieces dressed in a zesty vinaigrette.
-
Eggplant Dip (Baba Ganoush): Smoky eggplant puree blended with tahini makes an excellent dip that complements the soft texture of pita.
Common Mistakes to Avoid
Making gluten-free pita bread can be straightforward, but there are common pitfalls to watch out for. Here are some mistakes to avoid:
- Ignoring Ingredient Measurements: Precise measurements are crucial in gluten-free baking. Always use a kitchen scale for accuracy.
- Using Old Yeast: Fresh yeast is essential for a good rise. Check the expiration date and store it properly to ensure it’s active.
- Skipping the Psyllium Husk: This ingredient helps bind the dough and provides structure. Don’t omit it; otherwise, your pita may crumble.
- Not Allowing Dough to Rest: Patience is key! Letting the dough rest helps it hydrate and improves texture. Don’t rush this step.
- Overbaking the Pita: Keep an eye on cooking times! Overbaked pita can become tough. Aim for a light golden color for the best results.
Storage & Reheating Instructions
Refrigerator Storage
- Store gluten-free pita bread in an airtight container.
- It will last up to 4 days in the fridge.
Freezing Gluten-Free Pita Bread
- Wrap each pita individually in plastic wrap or foil.
- Place them in a freezer-safe bag; they can freeze for up to 3 months.
Reheating Gluten-Free Pita Bread
- Oven: Preheat to 350°F (175°C) and heat wrapped pitas for about 10 minutes until warm.
- Microwave: Place on a microwave-safe plate with a damp paper towel for about 20-30 seconds.
- Stovetop: Heat on a skillet over medium heat for 1-2 minutes on each side until warmed through.
Frequently Asked Questions
What is gluten-free pita bread made of?
Gluten-free pita bread typically consists of rice flour, tapioca flour, psyllium husk powder, yeast, and sugar. These ingredients create a fluffy texture without gluten.
How can I make Gluten-Free Pita Bread vegan?
This recipe is naturally vegan as it doesn’t contain any animal products. Just follow the instructions as written!
Is gluten-free pita bread healthy?
Gluten-free pita bread can be part of a healthy diet, especially when made from whole ingredients. It’s lower in carbs compared to regular bread alternatives.
Can I customize my Gluten-Free Pita Bread?
Absolutely! You can add herbs or spices like garlic powder or dried oregano for extra flavor.
How do I know if my yeast is active?
To check if your yeast is active, mix it with warm water and sugar. If it bubbles and froths within 5-10 minutes, it’s good to use.
Final Thoughts
This gluten-free pita bread recipe offers an easy way to enjoy homemade flatbread that’s both delicious and versatile. Whether you use it for wraps, dips, or as a side, feel free to customize with your favorite herbs or spices to suit your taste preferences!
Gluten-Free Pita Bread
Enjoy the delight of homemade Gluten-Free Pita Bread that is soft, fluffy, and incredibly versatile. This easy recipe allows you to create delicious flatbreads perfect for wraps, dips, or even as a base for mini pizzas. With simple ingredients like rice flour and tapioca flour, you can whip up these pitas in no time. Say goodbye to store-bought options and embrace the wholesome taste of freshly baked gluten-free bread. Perfect for any occasion, this pita bread pairs beautifully with your favorite fillings or sides, making it a staple in your kitchen.
- Prep Time: 15 minutes
- Cook Time: 7 minutes
- Total Time: 22 minutes
- Yield: Makes approximately five pitas 1x
- Category: Bread
- Method: Baking
- Cuisine: Mediterranean
Ingredients
- 3/4 cup + 2 tbsp warm water
- 10 g fresh yeast
- 1 1/2 tsp organic cane sugar
- 1 cup white rice flour
- 2/3 cup tapioca flour
- 2 tsp psyllium husk powder
- 1/2 tsp salt
- 2 tsp oil
Instructions
- Activate the yeast by combining warm water and sugar in a mixing bowl. Sprinkle yeast on top and let it sit for 5–10 minutes until frothy.
- In another bowl, whisk together rice flour, tapioca flour, psyllium husk powder, and salt until smooth.
- Pour the frothy yeast mixture into the dry ingredients along with oil and stir until a dough forms.
- Divide dough into five equal portions and roll each into balls. Flatten each ball into circles about 1/4-inch thick using a rolling pin.
- Preheat your oven to 450°F (232°C), placing a baking sheet inside to heat up.
- Transfer the rolled-out pitas onto parchment paper and place them on the hot baking sheet. Bake for about 5–7 minutes until they puff up and turn golden.
- Remove from the oven and let cool on a wire rack before serving.
Nutrition
- Serving Size: 1 pita (60g)
- Calories: 140
- Sugar: 1g
- Sodium: 210mg
- Fat: 2g
- Saturated Fat: 0g
- Unsaturated Fat: 1g
- Trans Fat: 0g
- Carbohydrates: 28g
- Fiber: 3g
- Protein: 3g
- Cholesterol: 0mg