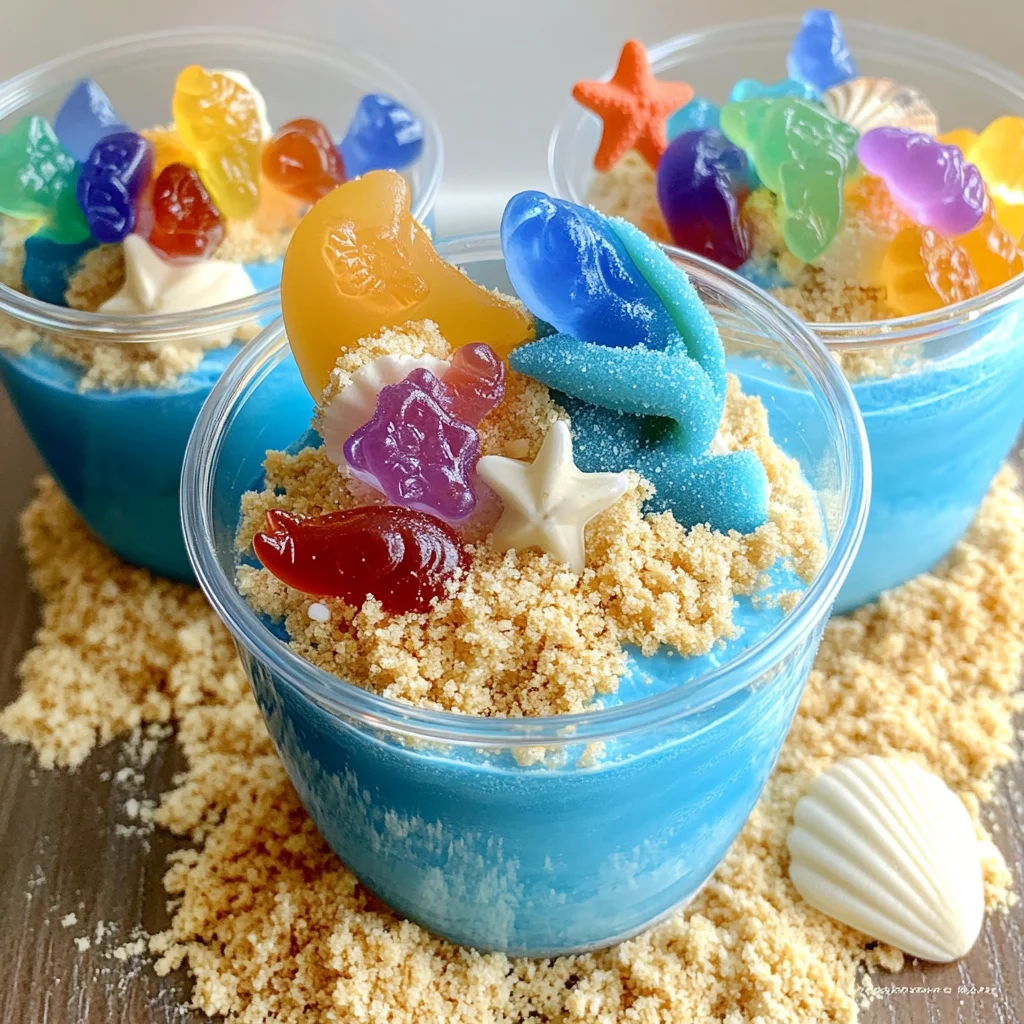
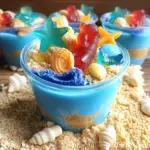
Sand Pudding Dessert Cups
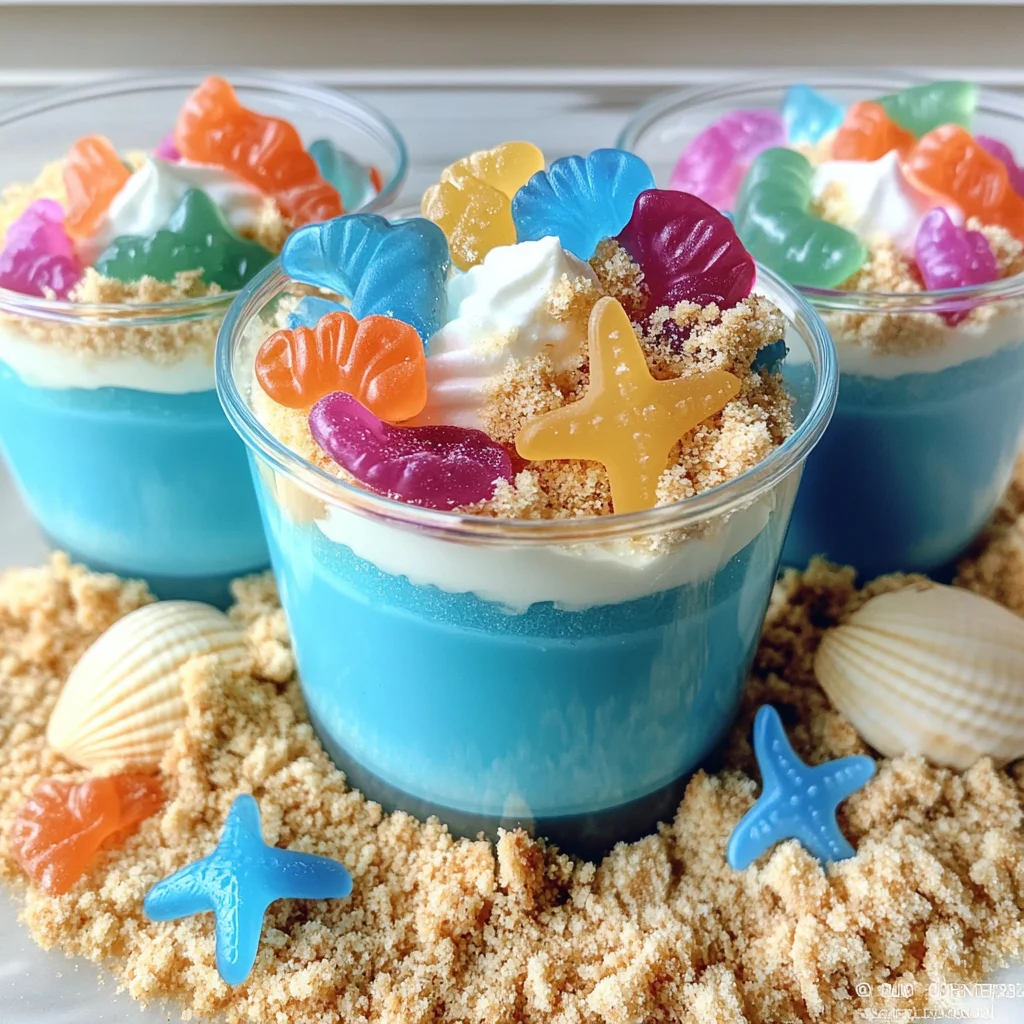
Sand Pudding Dessert Cups are a delightful treat that brings the fun of the beach right to your table. These vibrant and whimsical dessert cups are perfect for various occasions, from summer beach parties to Shark Week celebrations. With their eye-catching layers and playful decorations, they will surely be a hit with kids and adults alike. The combination of creamy pudding, crushed cookies, and colorful gummy sea creatures makes this dessert both visually appealing and incredibly delicious.
Why You’ll Love This Recipe
- Easy to Make: This simple no-bake recipe takes only 10 minutes of prep time, making it perfect for busy days or last-minute gatherings.
- Kid-Friendly: Kids will love helping out in the kitchen and decorating their own cups with gummy creatures and cookie sand.
- Versatile Presentation: Customize your Sand Pudding Dessert Cups for any occasion by changing the colors or decorations to match your theme.
- No Special Ingredients Required: You can easily find all the ingredients at your local grocery store, ensuring a hassle-free cooking experience.
- Delicious Flavor Combination: The mix of creamy vanilla pudding with crunchy cookie sand creates a delightful texture that appeals to all ages.
Tools and Preparation
To make these Sand Pudding Dessert Cups, you’ll need some essential tools to help you along the way. Having the right equipment makes the process smoother and ensures great results.
Essential Tools and Equipment
- Mixing bowl
- Whisk
- Refrigerator
- Food processor or resealable plastic bag
Importance of Each Tool
- Mixing bowl: A good-sized mixing bowl is essential for combining ingredients evenly without spills.
- Whisk: Using a whisk helps achieve a smooth consistency in your pudding mix, preventing lumps.
- Food processor or resealable plastic bag: These tools are perfect for crushing cookies into fine pieces, giving you that desired sandy texture.
Ingredients
These simple to make Sand Pudding Dessert Cups Recipe are perfect for a Beach Party, Shark Week, and more!
For the Pudding
- 3.4 oz Instant Vanilla Pudding
- 2 cups milk
- 8 oz whipped topping (thawed)
- Blue food coloring
For the Sand
- 6-8 Vanilla Sandwich Cookies (crushed) (Can also use graham crackers)
For Decoration
- Gummy sea creatures
- Gummy stars or shells
How to Make Sand Pudding Dessert Cups
Step 1: Prepare the Pudding Mix
- In a medium bowl, add cold milk.
- Stir in a few drops of blue food coloring until you achieve your desired ocean hue.
- Sprinkle in the instant vanilla pudding mix and whisk until well combined.
Step 2: Chill the Pudding
- Place the mixture in the refrigerator for about 10 minutes or until it sets.
Step 3: Fold in Whipped Topping
- Once set, fold in the thawed whipped topping gently until fully mixed.
Step 4: Layer in Cups
- Add the pudding mix into individual glasses or dessert cups.
- Return them to the refrigerator for another 20 minutes to chill.
Step 5: Prepare Cookie Sand
- Crush cookies in a food processor or resealable plastic bag until they reach a fine crumb consistency.
Step 6: Assemble Your Dessert Cups
- Spoon crushed cookies on one side of each cup to resemble beach sand.
- Decorate with gummy sea creatures and other edible decorations like stars or shells for extra flair.
Enjoy your delightful Sand Pudding Dessert Cups at your next gathering!
How to Serve Sand Pudding Dessert Cups
Sand Pudding Dessert Cups are not just delicious; they’re also visually appealing and fun for any occasion. Here are some creative ways to serve them that will impress your guests.
At a Beach Party
- Use sand buckets instead of traditional cups to create a fun beach vibe.
- Add mini umbrellas or beach-themed decorations for a festive touch.
During Shark Week
- Incorporate shark figurines on top of the pudding for an exciting theme.
- Use blue food coloring to enhance the ocean look of the dessert.
For Birthday Parties
- Personalize each cup with edible glitter to make them sparkle.
- Use colorful straws or spoons that match the party theme for extra flair.
As Kids’ Treats
- Let kids decorate their own cups with gummy creatures and cookie sand.
- Create a DIY station where they can customize flavors with different food colorings.
How to Perfect Sand Pudding Dessert Cups
Making the perfect Sand Pudding Dessert Cups is easy with a few simple tips. Here’s how to elevate your dessert game!
- Chill the Ingredients: Make sure your milk is cold before mixing. This helps the pudding set better.
- Layer Creatively: Alternate layers of pudding and crushed cookies for a more appealing presentation.
- Use Quality Gummy Candies: Choose vibrant, high-quality gummy sea creatures for better flavor and look.
- Adjust Sweetness: Taste the pudding mixture before chilling and adjust sweetness if needed by adding more sugar or using flavored extracts.
Best Side Dishes for Sand Pudding Dessert Cups
Pairing side dishes with your Sand Pudding Dessert Cups can create a well-rounded meal. Here are some delightful options:
- Fresh Fruit Skewers: Colorful fruit skewers complement the dessert and add freshness.
- Mini Sandwiches: Bite-sized sandwiches offer a savory contrast to the sweet pudding cups.
- Veggie Platter: Crunchy vegetables with a light dip provide a healthy balance.
- Cheese Cubes: A variety of cheese cubes can enhance flavors and offer variety.
- Popcorn Mix: Sweet and salty popcorn adds texture and fun to your spread.
- Pretzel Bites: Soft pretzel bites with mustard sauce provide an enjoyable crunch alongside dessert.
Common Mistakes to Avoid
When making Sand Pudding Dessert Cups, it’s easy to make a few common errors. Here are some mistakes to avoid for the best results.
-
Bold Color Mixing: Not adding enough blue food coloring can lead to a pale pudding that doesn’t resemble the ocean. Start with a few drops and adjust until you achieve your desired shade.
-
Overmixing Whipped Topping: Be careful not to overmix when folding in the whipped topping. This can deflate the mixture, making it less fluffy. Gently fold until just combined.
-
Skipping Chill Time: Failing to chill the pudding can result in a runny dessert. Ensure you refrigerate for both 10 minutes for the pudding and 20 minutes after layering.
-
Inconsistent Cookie Crumbles: Crushing cookies too coarsely may affect how they look as ‘sand’ on top of your dessert. Aim for fine crumbs by using a food processor or rolling pin.
-
Ignoring Decoration: Skimping on gummy sea creatures and decorations can make your dessert look less appealing. Use a variety of gummies for a fun, festive look.
Storage & Reheating Instructions
Refrigerator Storage
- Store Sand Pudding Dessert Cups in airtight containers.
- They can be kept in the refrigerator for up to 3 days for optimal freshness.
Freezing Sand Pudding Dessert Cups
- It is not recommended to freeze these cups as the texture may change upon thawing.
- If you must freeze, use freezer-safe containers and consume within a month.
Reheating Sand Pudding Dessert Cups
- Oven: Not applicable; do not heat pudding cups in an oven.
- Microwave: Avoid microwaving as this will alter texture; serve chilled.
- Stovetop: Not suitable for stovetop reheating; enjoy cold straight from the fridge.
Frequently Asked Questions
If you have questions about making Sand Pudding Dessert Cups, you’re in the right place!
What makes Sand Pudding Dessert Cups appealing?
Sand Pudding Dessert Cups are visually stunning and deliciously creamy, making them perfect for parties or family gatherings.
Can I customize my Sand Pudding Dessert Cups?
Yes! You can add different colors or toppings such as crushed fruit snacks or other themed candies to suit any occasion.
How long do Sand Pudding Dessert Cups last?
They last up to 3 days in the refrigerator when stored properly in airtight containers.
Are there alternatives for whipped topping?
You can use non-dairy whipped toppings if you prefer a dairy-free version of Sand Pudding Dessert Cups.
Can children help with this recipe?
Absolutely! Kids love layering and decorating these cups, making it a fun activity for all ages.
Final Thoughts
Sand Pudding Dessert Cups are a delightful treat perfect for any beach-themed event or party. Their vibrant colors and fun decorations make them appealing to both kids and adults alike. Feel free to customize them with various toppings to suit your taste or occasion. Try them today!
Sand Pudding Dessert Cups
Sand Pudding Dessert Cups are a fun and whimsical treat that brings the beach straight to your kitchen! Perfect for summer gatherings, birthday parties, or themed events, these vibrant dessert cups combine creamy vanilla pudding with crunchy cookie “sand” and colorful gummy sea creatures. With just a few simple ingredients and minimal prep time, you can create a delightful dessert that’s sure to impress both kids and adults alike. The playful layers and decorations make these cups not only delicious but also an eye-catching centerpiece for any occasion.
- Prep Time: 10 minutes
- Cook Time: None
- Total Time: 0 hours
- Yield: Serves 4
- Category: Dessert
- Method: No-bake
- Cuisine: American
Ingredients
- 3.4 oz Instant Vanilla Pudding
- 2 cups milk
- 8 oz whipped topping (thawed)
- Blue food coloring
- 6–8 Vanilla Sandwich Cookies (crushed)
- Gummy sea creatures
Instructions
- In a medium bowl, combine cold milk and a few drops of blue food coloring until the desired ocean hue is reached.
- Add the instant vanilla pudding mix and whisk until smooth.
- Chill the mixture in the refrigerator for about 10 minutes until it thickens.
- Gently fold in the thawed whipped topping until fully combined.
- Layer the pudding in individual dessert cups, returning them to the fridge for another 20 minutes to chill.
- Crush cookies into fine crumbs using a food processor or resealable plastic bag to create the "sand."
- Spoon crushed cookies on top of each cup and decorate with gummy sea creatures.
Nutrition
- Serving Size: 1 serving
- Calories: 210
- Sugar: 18g
- Sodium: 150mg
- Fat: 9g
- Saturated Fat: 5g
- Unsaturated Fat: 3g
- Trans Fat: 0g
- Carbohydrates: 30g
- Fiber: 1g
- Protein: 3g
- Cholesterol: 10mg