Dirt Cups
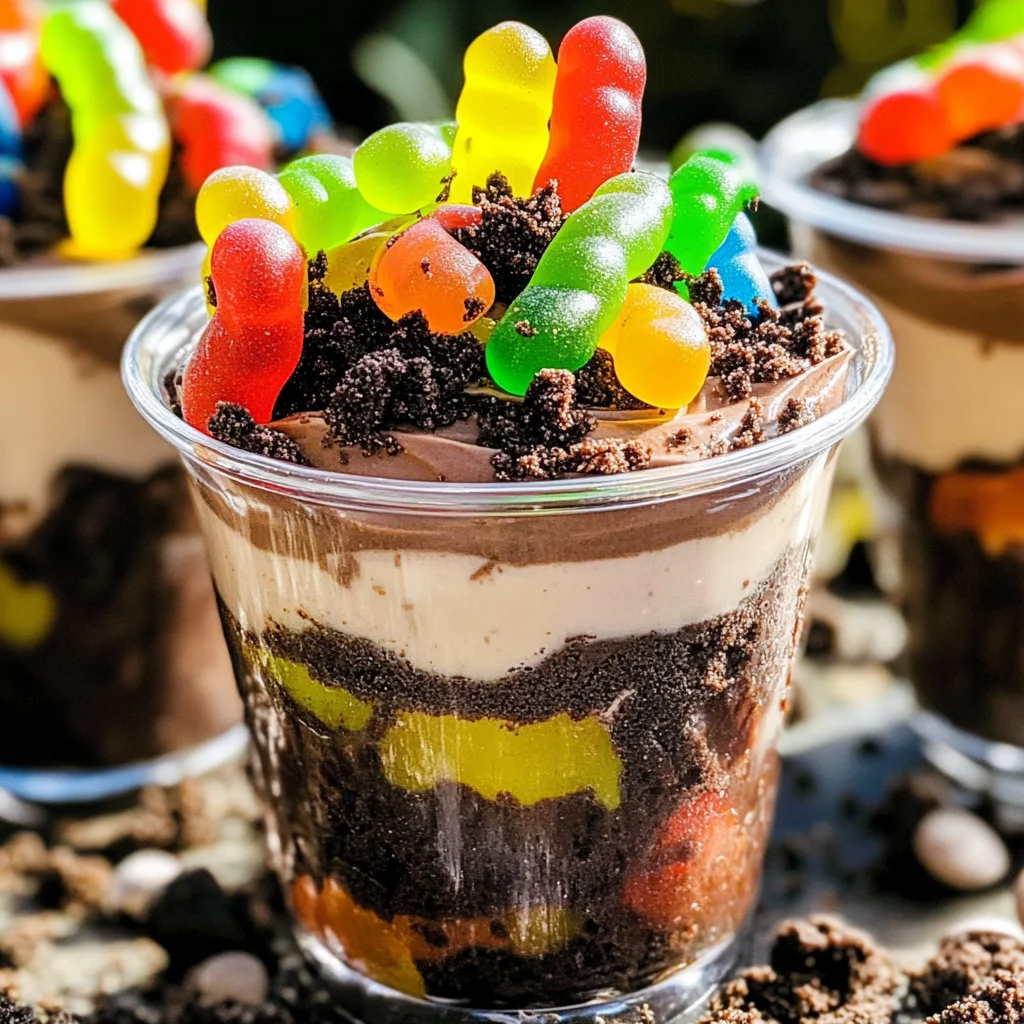
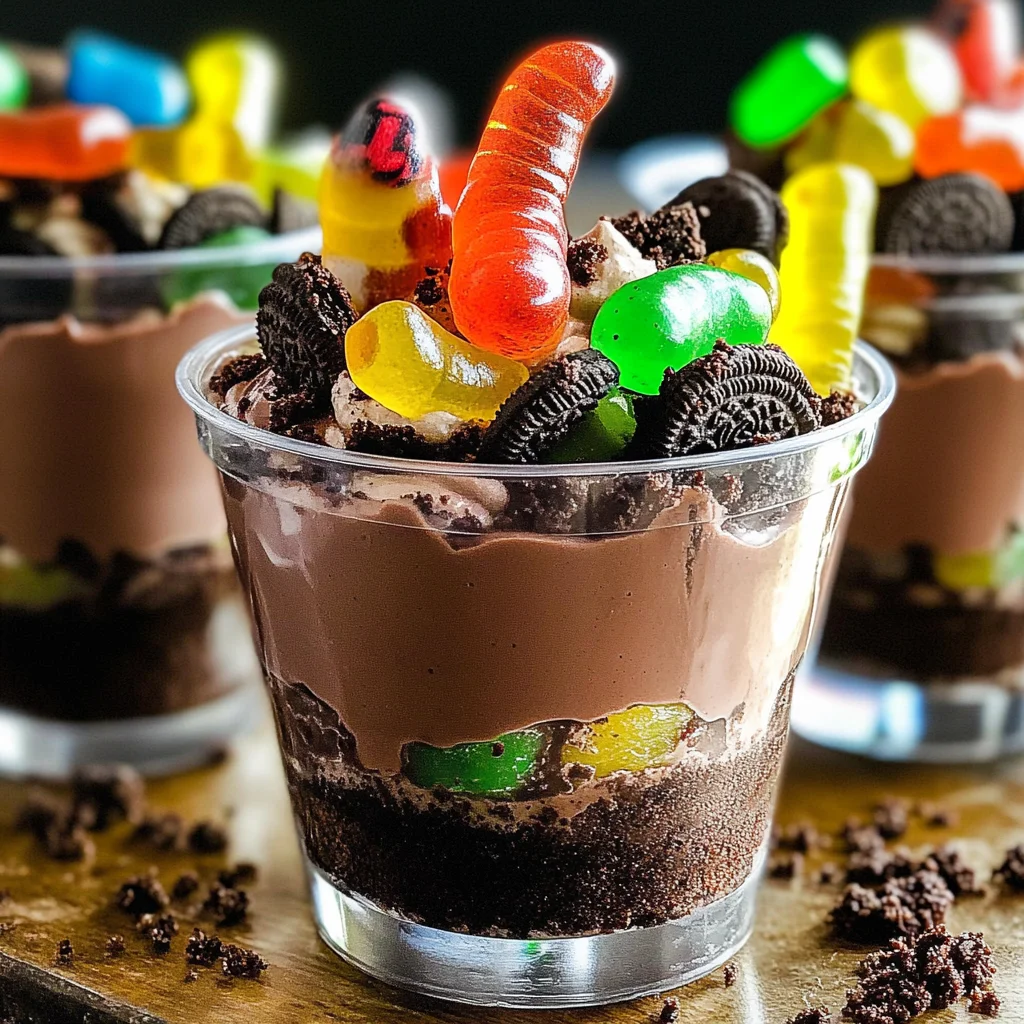
Dirt Cups are a delightful dessert that brings joy to any gathering. With layers of creamy chocolate pudding, crunchy crushed Oreos, and colorful pectin-based gummy candies on top, these cups are perfect for kids and adults alike. Whether you’re hosting a birthday party, celebrating Halloween, or just looking for a fun treat, Dirt Cups will impress your guests. Their appealing presentation and delicious flavors make them a standout dessert option for any occasion.
Why You’ll Love This Recipe
- Easy to Make: With just a few simple steps, you can whip up these delightful cups in no time.
- Kid-Friendly: Kids love the fun textures and flavors, making this dessert a hit at parties.
- Versatile Presentation: Serve in individual cups for a neat look or in a large bowl for communal enjoyment.
- Customizable Toppings: Feel free to mix in other candies or sprinkles to match your theme or preferences.
- Perfect for Any Occasion: From birthdays to holiday gatherings, Dirt Cups fit right in at any celebration.
Tools and Preparation
Creating Dirt Cups is not only fun but also requires minimal preparation. Gather the following tools before you start.
Essential Tools and Equipment
- Mixing bowl
- Whisk
- Spoon
- Glasses or cups for serving
Importance of Each Tool
- Mixing bowl: A medium-sized mixing bowl allows you to combine all ingredients effectively without spills.
- Whisk: Using a whisk ensures the pudding mix blends smoothly with the milk, avoiding lumps.
- Spoon: A sturdy spoon helps with layering the pudding and toppings neatly in your serving cups.
- Glasses or cups for serving: Individual serving glasses create an attractive presentation and make it easy for guests to enjoy their desserts.
Ingredients
Layers of chocolate pudding, crushed Oreos topped with pectin-based gummy candies!
For the Pudding Layer
- 3.4 ounces box instant chocolate pudding mix
- 2 cups milk
- 8 ounces whipped topping (thawed)
For the Topping Layer
- 10-12 Oreo cookies (crushed)
- 32 pectin-based gummy candies
How to Make Dirt Cups
Step 1: Prepare the Pudding
- In a medium bowl, add cold milk and sprinkle pudding over top.
- Whisk until well combined.
- Let sit for 5 minutes to thicken.
Step 2: Combine with Whipped Topping
- Gently fold in the whipped topping until well mixed.
Step 3: Layer in Cups
- Spoon the pudding mixture into glasses or cups.
- Sprinkle crushed Oreo cookies on top of the pudding in each cup.
Step 4: Add Gummy Candies
- Place 4 pectin-based gummy candies on top of each cup.
Step 5: Chill Before Serving
- Chill Dirt Cups until ready to serve and enjoy!
How to Serve Dirt Cups
Dirt Cups are a fun and delightful dessert that can be enjoyed in various creative ways. Here are some serving suggestions to make your Dirt Cups even more appealing.
Individual Dessert Cups
- Serve in small glasses for a personal touch. Layer the pudding and Oreo cookies for a beautiful presentation.
Party Platters
- Create a dessert table with multiple Dirt Cups. This allows guests to choose their favorite flavors and decorations.
Themed Parties
- Decorate with themed toppings like gummy worms for Halloween or bright-colored candies for birthday parties. This adds excitement to the dessert.
Family Style Serving
- Use a large bowl to serve and let everyone scoop their own portions. This makes it easy for gatherings and family events.
How to Perfect Dirt Cups
Perfecting your Dirt Cups can elevate this simple treat into an extraordinary dessert. Here are some tips to enhance your Dirt Cups experience.
- Chill before serving: Allow the assembled cups to chill in the fridge for at least 30 minutes. This helps the layers set nicely and improves flavor melding.
- Use fresh ingredients: Always use fresh milk and toppings to ensure the best taste and texture.
- Experiment with flavors: Try using different flavored puddings, such as vanilla or butterscotch, for a unique twist on traditional Dirt Cups.
- Add extra crunch: Incorporate other crunchy elements like graham cracker crumbs or nuts between layers for added texture.
- Personalize toppings: Allow guests to customize their Dirt Cups with various gummy candies or sprinkles, making it interactive and fun.
Best Side Dishes for Dirt Cups
Pairing side dishes with your Dirt Cups can create a delightful meal experience. Here are some excellent options to consider.
- Fruit Salad: A refreshing mix of seasonal fruits balances the richness of the Dirt Cups.
- Mini Sandwiches: Bite-sized sandwiches provide a savory contrast that complements the sweet dessert.
- Veggie Platter: Fresh vegetables with dip offer a crunchy and healthy side that contrasts well with the creamy texture of Dirt Cups.
- Cheese Platter: A selection of cheeses adds variety and pairs nicely with sweet desserts.
- Chocolate Dipped Pretzels: These sweet and salty snacks bring additional flavor dimensions to your dessert table.
- Cookies: Offering an assortment of cookies enhances the dessert experience, allowing guests to mix textures and flavors.
Common Mistakes to Avoid
When making Dirt Cups, a few common mistakes can detract from the fun and flavor. Here are some tips to help you avoid them.
- Skipping the Thickening Step: Not allowing the pudding mixture to sit for 5 minutes can result in a runny dessert. Always let it thicken properly for the best texture.
- Overmixing the Whipped Topping: If you mix too vigorously, the whipped topping can lose its lightness. Gently fold it in to maintain airiness.
- Using Uncrushed Oreos: Leaving Oreos whole will not create that delightful dirt effect. Crush them well for an authentic presentation.
- Not Chilling Long Enough: Serving immediately can lead to a less enjoyable texture. Chill your Dirt Cups for at least 30 minutes before serving.
- Ignoring Customization Options: Sticking strictly to the recipe can limit creativity. Feel free to add different toppings or flavors based on your preferences.
Storage & Reheating Instructions
Refrigerator Storage
- Store leftover Dirt Cups in airtight containers.
- They can be kept in the refrigerator for up to 2 days without losing flavor.
Freezing Dirt Cups
- Freezing is not recommended as it may affect texture and consistency.
- If necessary, store in freezer-safe containers and consume within one month.
Reheating Dirt Cups
- Oven: Not recommended; these are best served cold.
- Microwave: Use sparingly; only warm slightly if desired but avoid overheating.
- Stovetop: Not applicable; these cups should remain chilled for optimal enjoyment.
Frequently Asked Questions
Here are some common questions about making Dirt Cups that might help clarify any doubts.
What are Dirt Cups?
Dirt Cups are a delicious dessert made with layers of chocolate pudding, crushed Oreos, and gummy candies, resembling a fun dirt theme.
How long do Dirt Cups last in the fridge?
Dirt Cups can last up to 2 days when stored properly in an airtight container in the refrigerator.
Can I customize my Dirt Cups?
Absolutely! You can add different toppings like sprinkles, other candy types, or even fruit slices for added flavor and fun.
Are there alternatives to Oreos for dirt cups?
Yes! You can use any chocolate cookies or even gluten-free options if desired. Just ensure they are crushed well.
Final Thoughts
Dirt Cups are a delightful treat that’s easy to make and perfect for any occasion. Their playful appearance and customizable ingredients make them suitable for both kids and adults alike. Experiment with your favorite toppings or flavors to create your own spin on this classic dessert!
Dirt Cups
Dirt Cups are a whimsical and delightful dessert that combines layers of rich chocolate pudding, crunchy crushed cookies, and vibrant pectin-based gummy candies. This fun treat is perfect for any gathering, from birthday parties to family celebrations. With their playful presentation and delicious flavors, Dirt Cups are sure to be a hit with both kids and adults alike. Easy to make and highly customizable, you can tailor this dessert to suit any theme or preference.
- Prep Time: 15 minutes
- Cook Time: 0 minutes
- Total Time: 15 minutes
- Yield: Serves approximately 6 cups 1x
- Category: Dessert
- Method: No-bake
- Cuisine: American
Ingredients
- 3.4 ounces instant chocolate pudding mix
- 2 cups milk
- 8 ounces whipped topping (thawed)
- 10–12 crushed Oreo cookies
- 32 pectin-based gummy candies
Instructions
- In a mixing bowl, combine cold milk and pudding mix. Whisk until smooth and let sit for 5 minutes to thicken.
- Gently fold in the whipped topping until well blended.
- Layer the pudding mixture into serving cups, followed by the crushed Oreos.
- Top each cup with four pectin-based gummy candies.
- Chill in the refrigerator until ready to serve.
Nutrition
- Serving Size: 1 dirt cup (150g)
- Calories: 320
- Sugar: 22g
- Sodium: 210mg
- Fat: 15g
- Saturated Fat: 7g
- Unsaturated Fat: 6g
- Trans Fat: 0g
- Carbohydrates: 44g
- Fiber: 1g
- Protein: 4g
- Cholesterol: 10mg